
How to create an AI interior visualization - step by step (not just 3D scenes!)
How to create an AI interior visualization? You can do it in a few minutes: you upload a scene from any 3D program (SketchUp, CAD Decor, pCon or homestyler), choose a lighting style and optionally describe (or visually point out!) what you want to change - the tool generates a realistic image, without a 3D program, rendering or technical skills. Heck, it doesn't even have to be a scene - it can even be a pencil sketch (though the best results come when the input has clearly defined proportions and materials). Below we show the whole process step by step.

Contents
What is an AI interior visualization (and how is it different from a 3D render)?
A classic render, for example in the V-Ray engine, is pure math - the program calculates every ray of light hitting the scene, which gives us one hundred percent control over the final effect. The price for this precision, however, is a huge amount of technical knowledge and a long working time, both at the modeling stage and during the rendering itself. AI visualizations based on a screenshot work in a completely different way - the starting point is a ready-made frame, and the algorithm itself "understands" the geometry of the room and fills in the missing elements, such as lighting, shadows or material textures.
The mechanism can be compared to the work of an experienced draftsman who, upon seeing a sketch, immediately knows how to add the missing shadows and light reflections. The algorithm analyzes the layout of the walls, windows and furniture in the uploaded image, and then generates a new layer of light, textures and details, while preserving the original geometry of the room. Thanks to this, the proportions of the furniture and the layout of the space remain true to reality - only the way they are shown changes.
A natural question arises: can such an image be distinguished from a real photograph? The answer is: practically not. AI-generated visualizations are fully photorealistic, and generating a single frame takes a maximum of 60 seconds, usually much less. This is a pace that no traditional rendering engine can match, and the final quality doesn't suffer at all.
Let's take a simple example from a designer's everyday work. Having a ready, schematic model of a living room, we can generate three different lighting variants in one afternoon - daytime, evening and golden hour - and show them to the client the same day. With classic rendering, each of these variants would mean separate calculations taking many minutes, sometimes many hours.
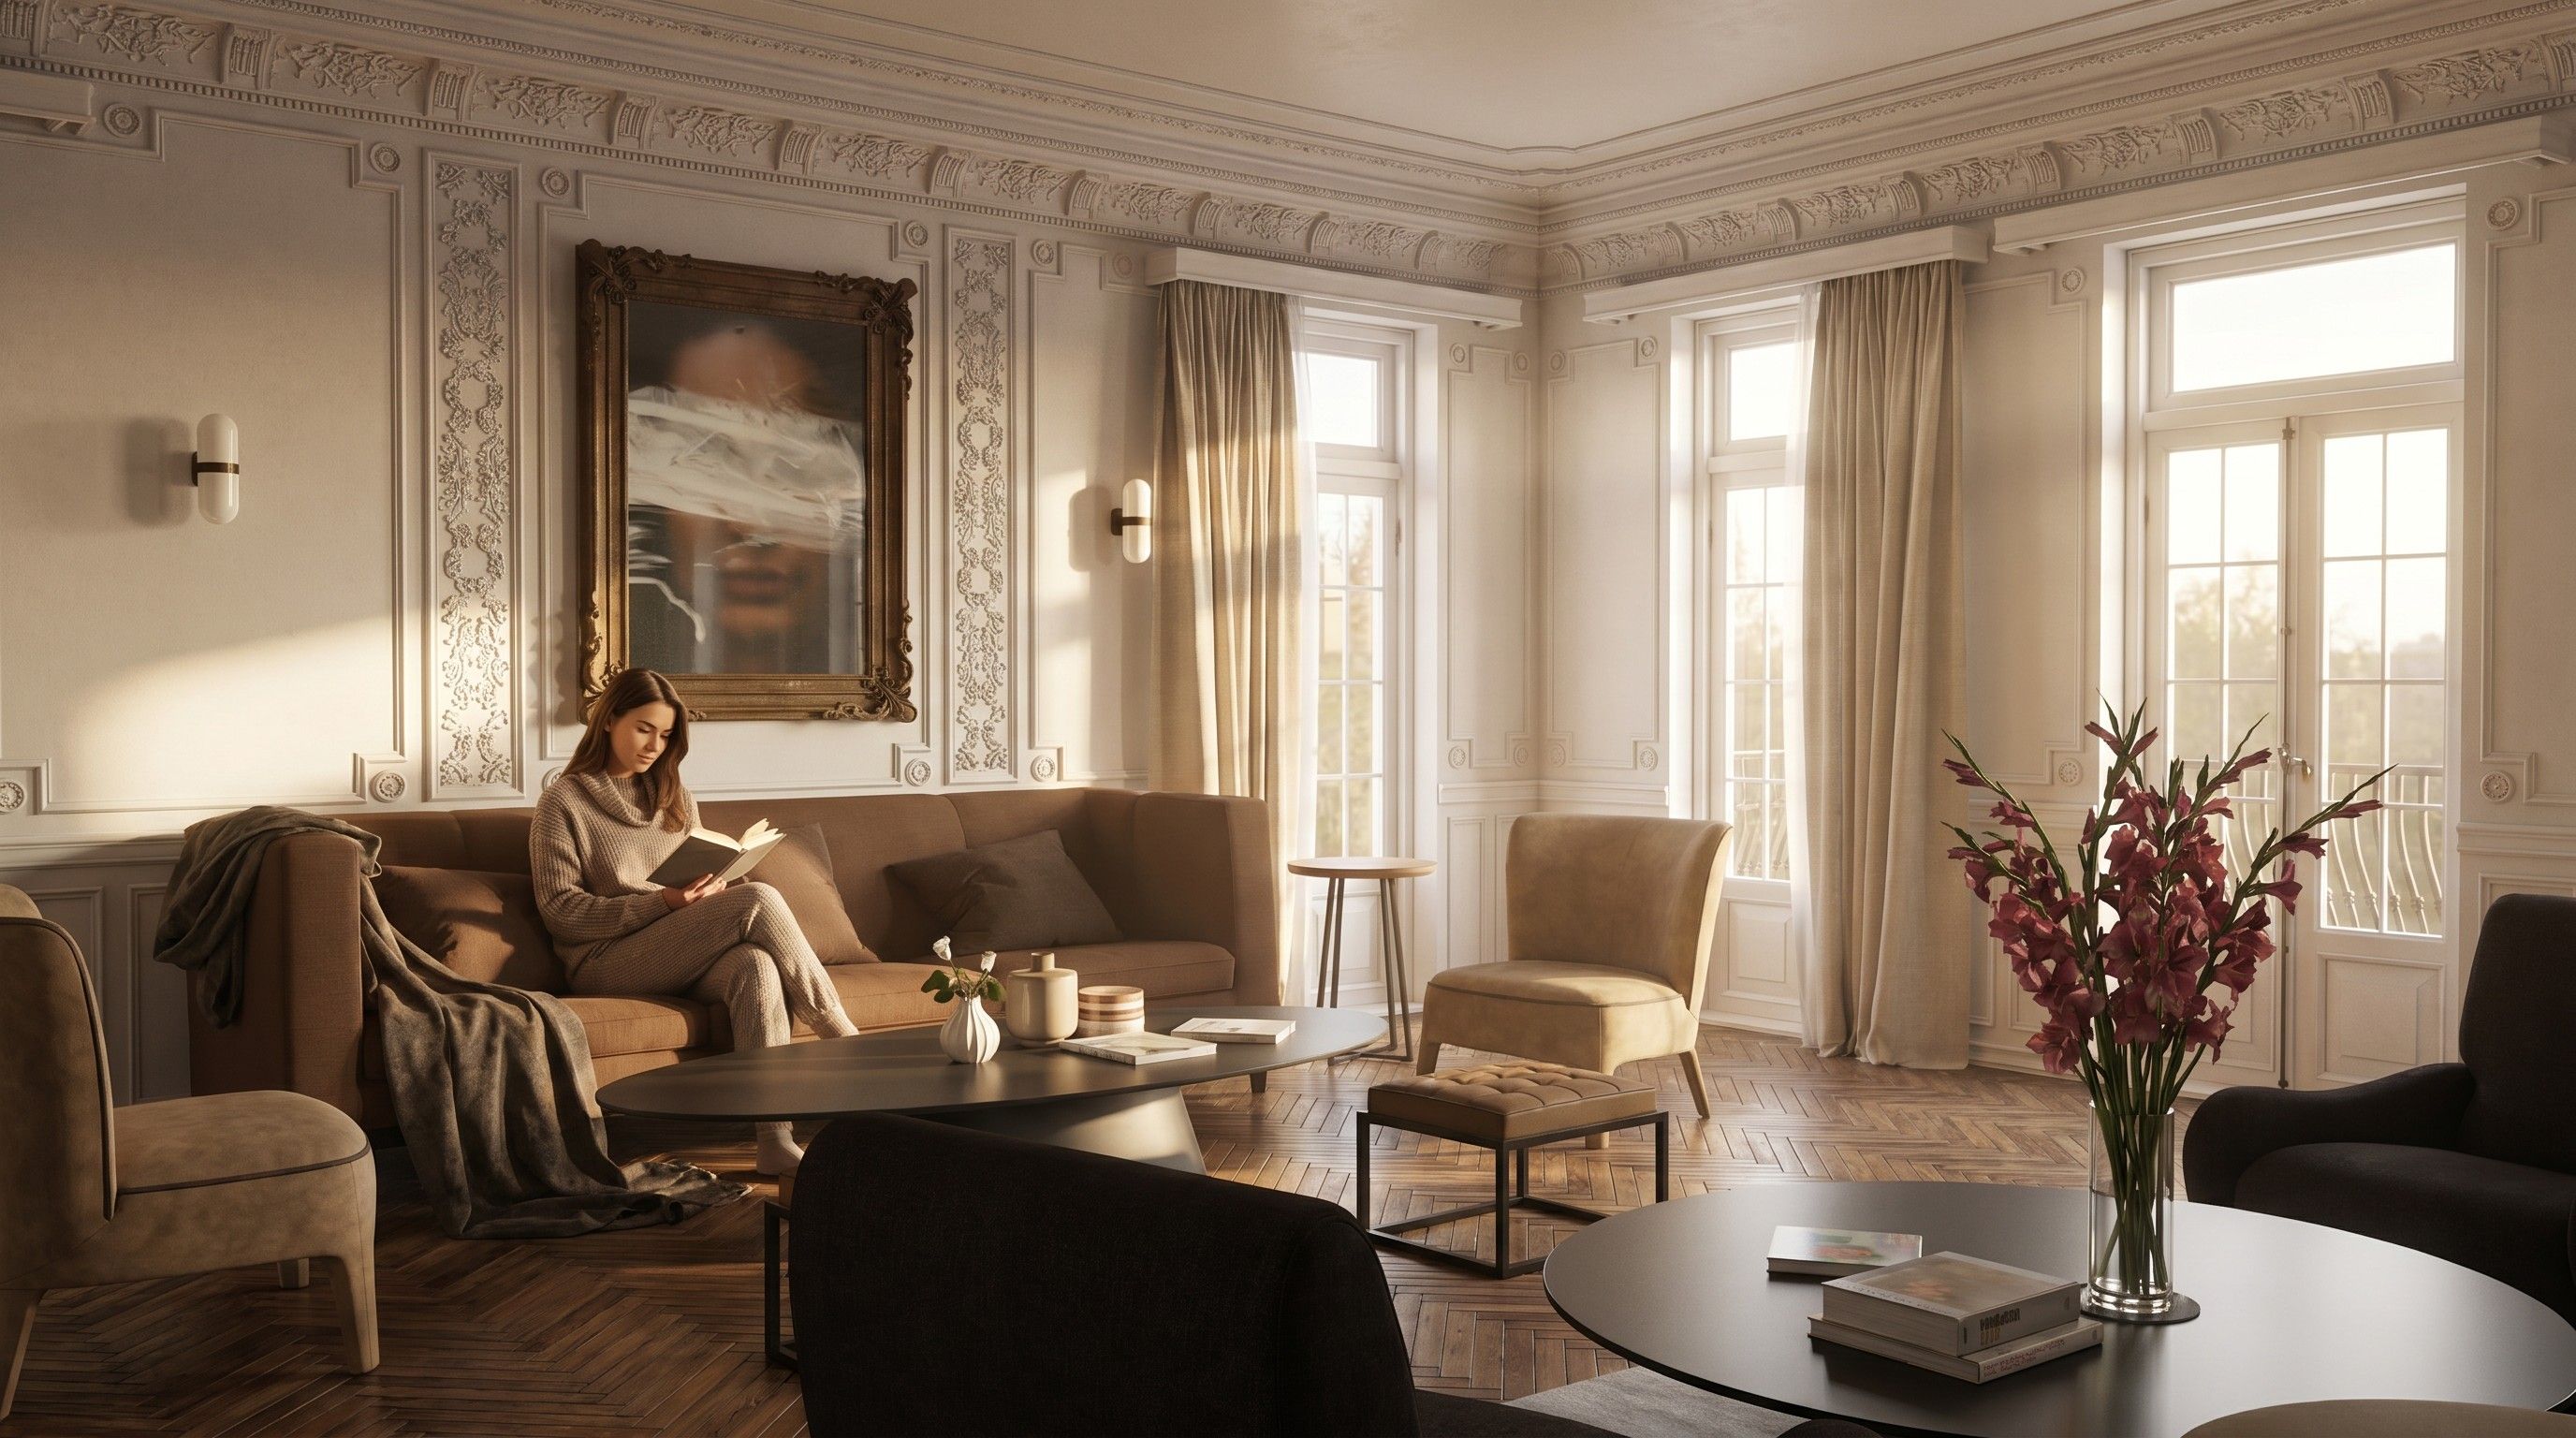
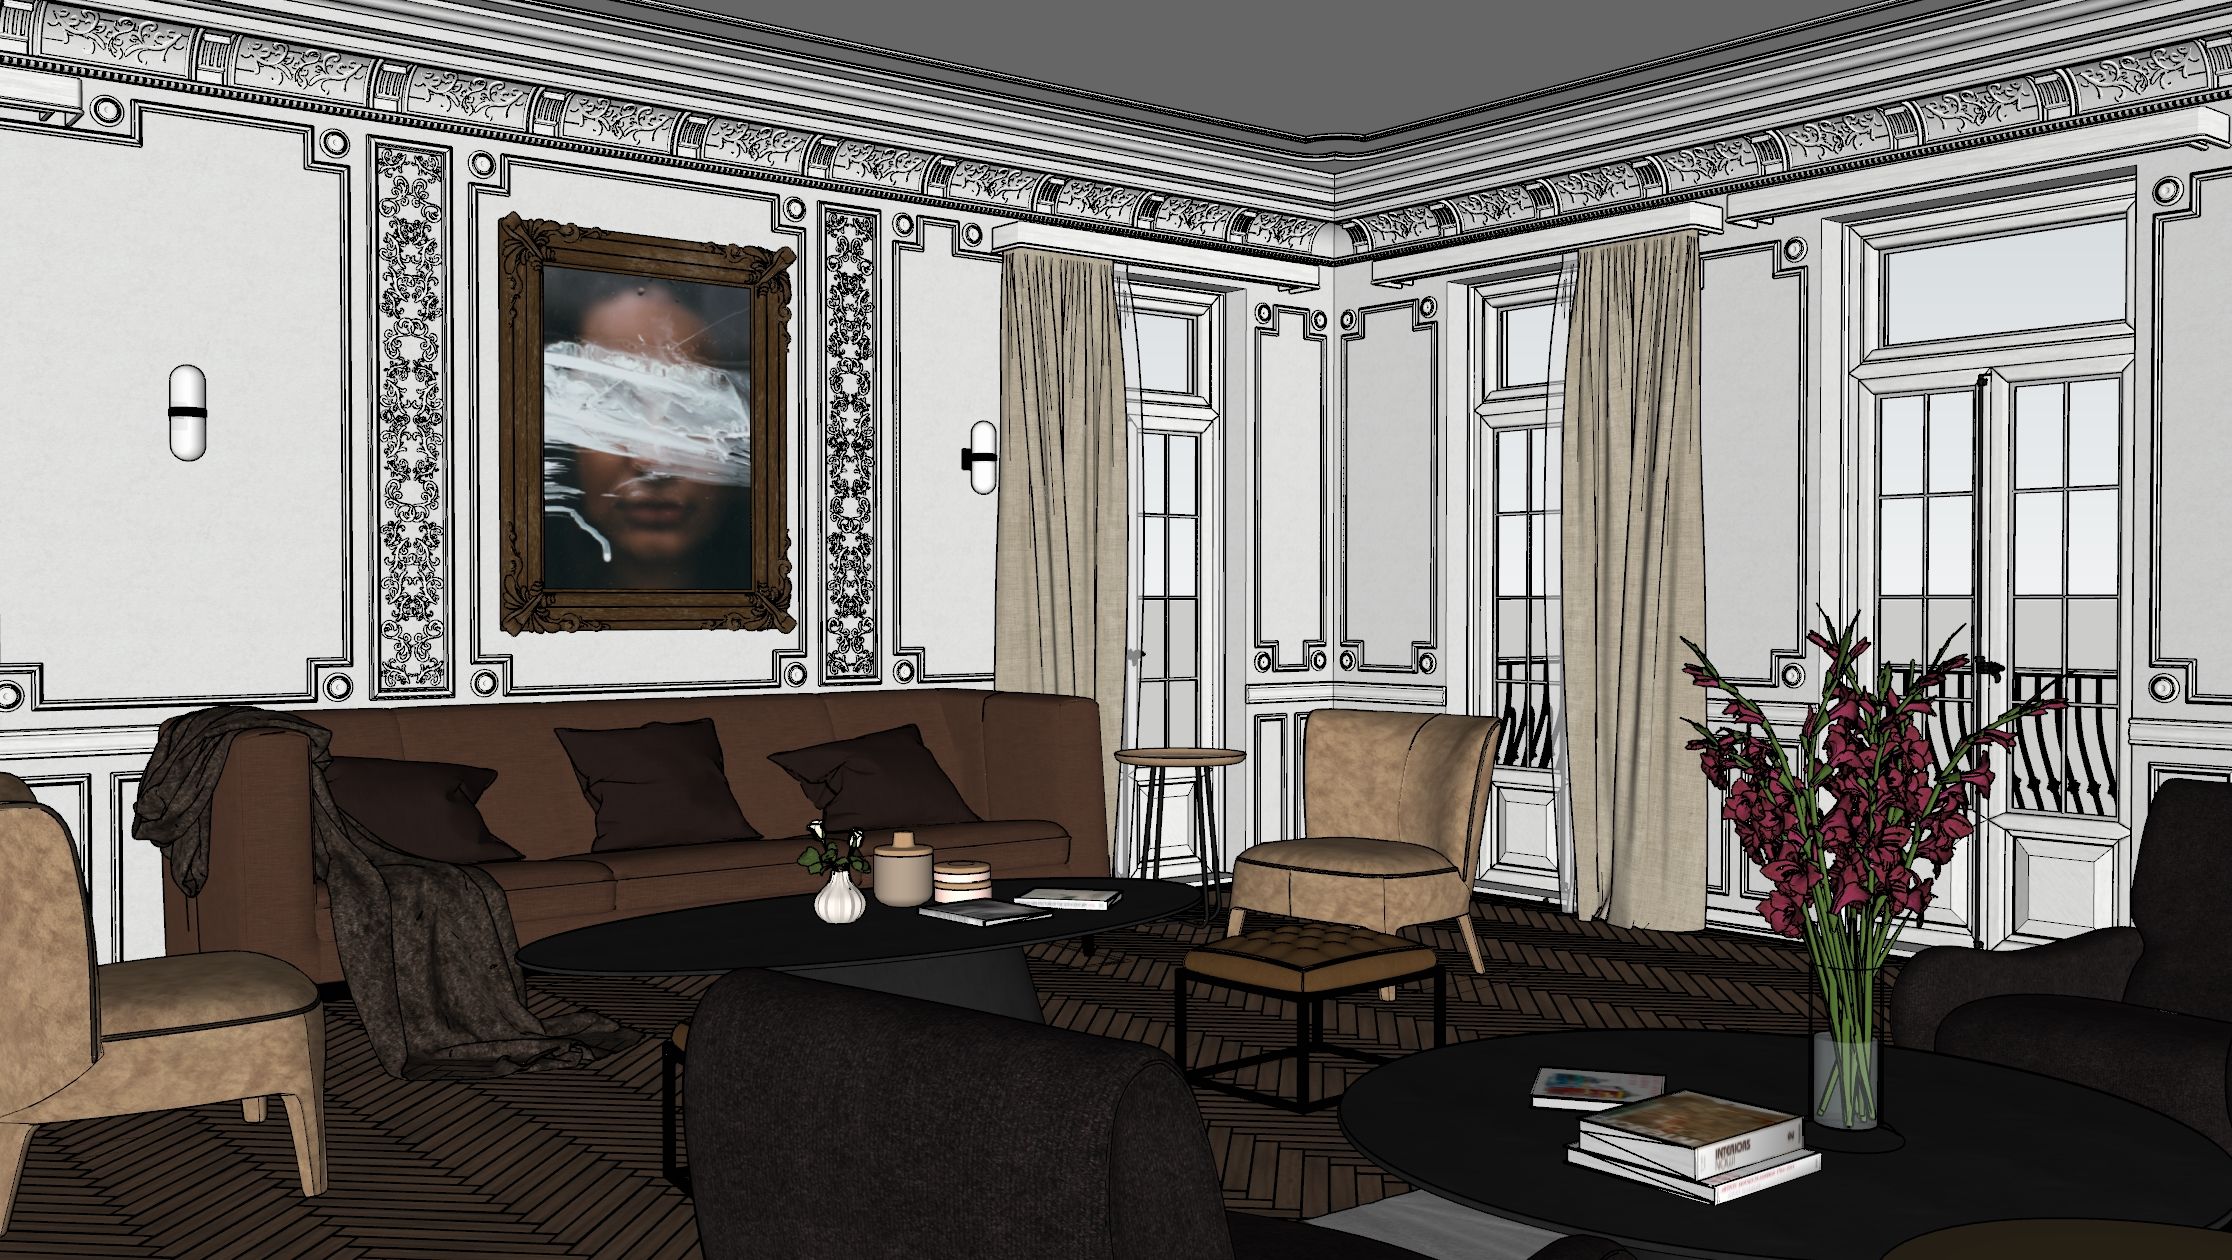 BeforeAfter
Where to create AI visualizations and what do you need to get started?
Most of the frustration with generating AI images comes from writing prompts - you need to hit on the right words, and the result is still a bit of a lottery. General models such as ChatGPT, Gemini, Google Flow or Google AI Studio require elaborate text descriptions, and even so they sometimes hallucinate geometry, add watermarks or limit the output resolution to 2K, while in Raya we get an image in quality up to 4K, ready to present on a large screen or for print. We designed Raya.design specifically for the architecture and interior design industry, so if we're looking for the answer to where to create AI visualizations without these limitations, the whole process is based on clicking ready-made options, not describing a vision in words.
Importantly, all the work takes place in the browser - there's no need to install anything or update your graphics card drivers. A computer with internet access is enough to generate a professional visualization, regardless of whether you're working on Windows or Mac.
We don't need advanced 3D programs for this - a simple model with basic room proportions and materials is fully sufficient. It's also worth clearing up any legal doubts right away: visualizations generated under the appropriate plan can be used 100% commercially, showing them to clients without any worries about copyright.
We start completely free of charge - registering on Raya.design gives you access to a package of free starter credits, which are enough for your first test visualizations. If you want to get to know the whole platform a bit more broadly before you start, it's worth checking out the article: What is Raya and how does it work.
For a design studio, this is a real change in the way work is organized. Instead of commissioning an expensive photo shoot of a styled interior or paying a graphic designer for many hours of rendering, you save both budget and time, which can be devoted to the actual design work. Fewer revisions, fewer misunderstandings with the client and less frustration on both sides - these are the real benefits that more and more architectural firms are experiencing.
If you'd like to learn more and see the other Raya features in action, it's worth watching our webinar on YouTube - where we show all the platform's capabilities - from photorealistic visualizations, through virtual home staging, to the app's other features.
The ideal input file: what to avoid, and what works best?
The quality of the input material has a huge impact on the final effect. Here the golden mean rule applies - the more the input resembles a real interior, meaning it preserves true proportions and at least an outline of the materials, the better the result will be. If we upload an almost finished render with lighting already set up, the algorithm won't have much room to work with, because there's nothing left for it to fill in. Theoretically, it can even handle a hand-drawn pencil sketch, although of course you can imagine what the result might look like then.
So what works best? Here are a few proven rules worth keeping in mind already at the modeling stage:
A scene with a set camera - showing the room at an appropriate, natural angle, preferably at eye level, so as to capture as much of the interior as possible in a single frame.
Clearly visible materials - so it's unambiguously clear what a given element of the interior is made of, for example whether the floor is wood, tile or panels.
A subtle edge style - thin, delicate lines make it easier for the algorithm to correctly read the geometry, unlike thick outlines and profiles, which can be misinterpreted as structural elements.
Hidden axes, markers and other helper elements - only the scene itself should be visible in the frame, without any extra software markings that could distort how the algorithm reads the geometry.
Ambient Occlusion turned on - it deepens the shadows in corners and at surface junctions, which helps the AI better interpret the space and depth of the room.
Light and shadows from scene settings turned off - the algorithm itself takes care of realistic lighting and shadows, so there's no need to set them up or render them beforehand.
High resolution - at least 1440 pixels on the shorter side of the frame, so the algorithm has more detail to work with and produces a more accurate result.
And what should you definitely avoid? Below are the most common mistakes that limit the algorithm's capabilities:
Dark and blurry screenshots - too little information about geometry and materials.
Flat axonometric views - lack of perspective makes it hard to read the depth of the room.
Technical cross-sections - this is an engineering view, not a realistic scene.
How to create AI visualizations - a step-by-step guide
Now that we know what input material works best, let's move on to the process itself. Below, step by step, we show what the whole workflow looks like in the Raya.design panel.
Step 1: Upload the base image
The first step is to upload the base image in the generation panel. We accept screenshots from any popular software - from SketchUp, through CAD Decor, to pCon - in jpg or png format. The file should have a high resolution, preferably at least 1920x1080 pixels, good visibility of the room and materials marked as clearly as possible. It's also worth cropping the frame so that the room or element we care about most is at the center. For those working in SketchUp, ArchiCAD, Revit or 3ds Max dedicated plugins are available to install, letting you generate visualizations directly from within the program, without manually taking and uploading a screenshot. All plugins can be found on the plugins subpage.
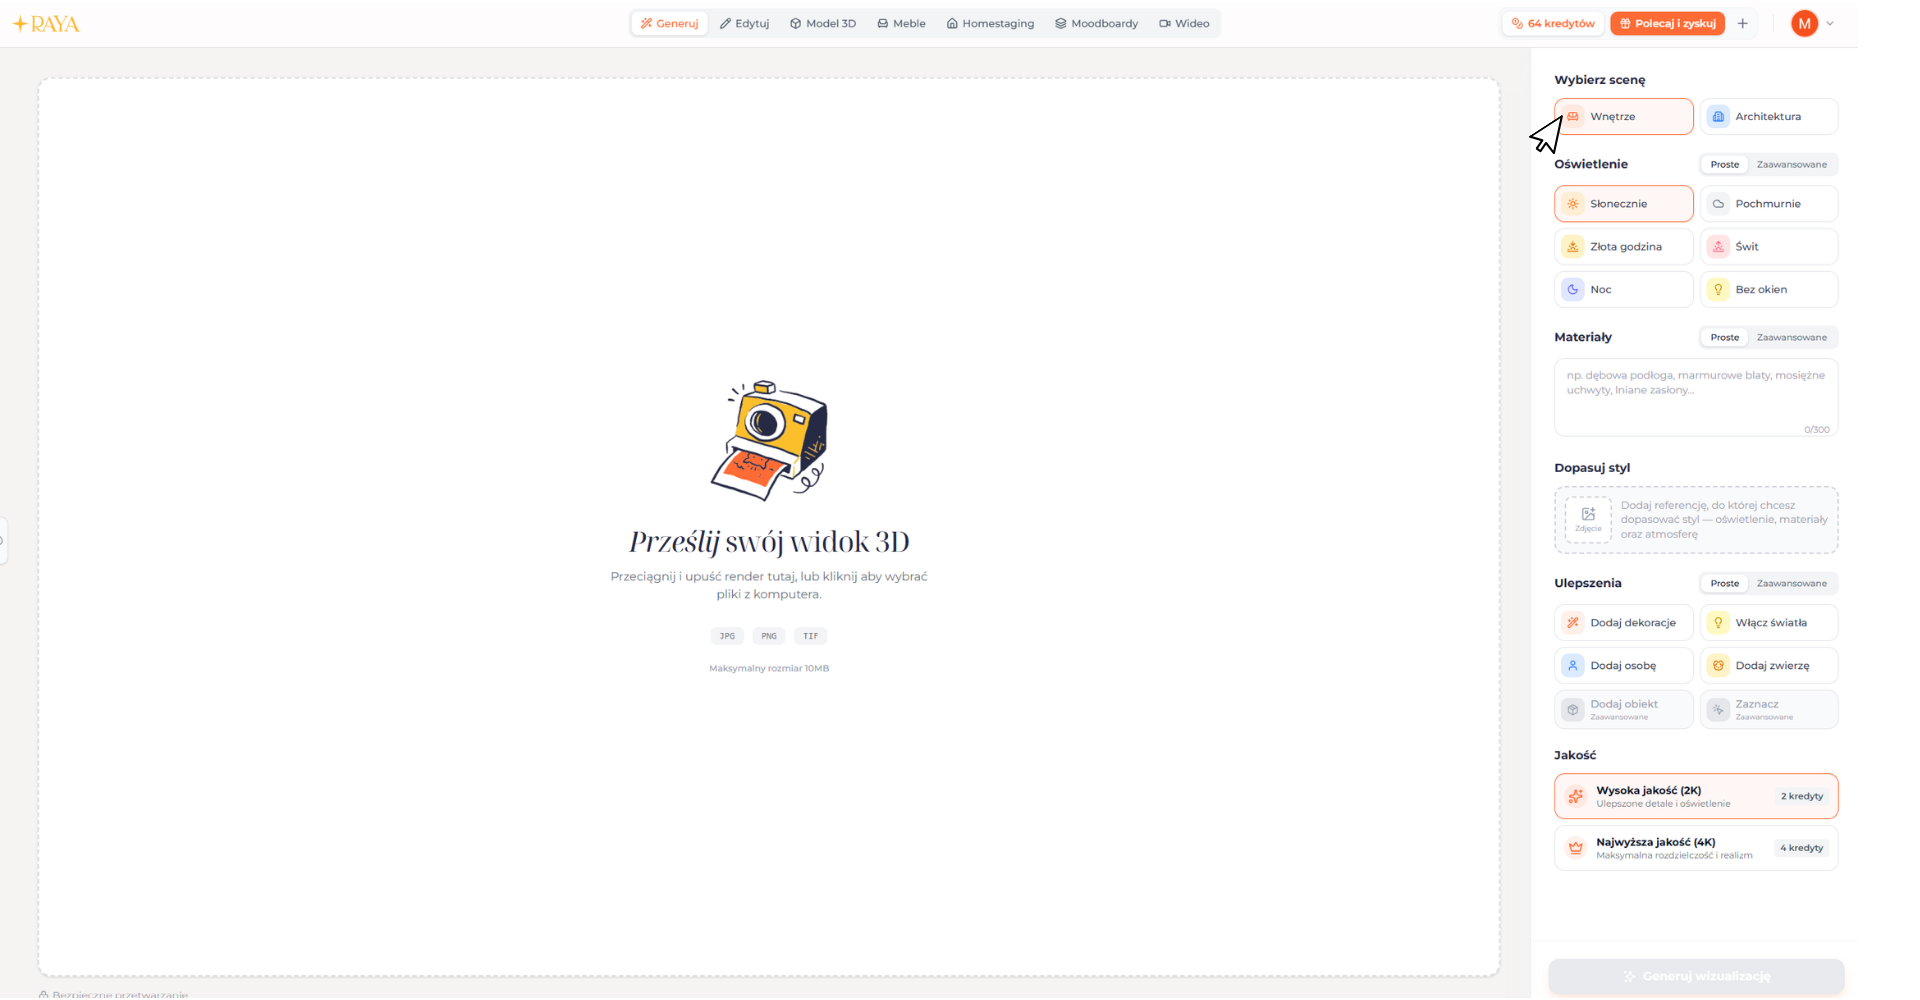
Step 2: Choose lighting and style (zero prompts)
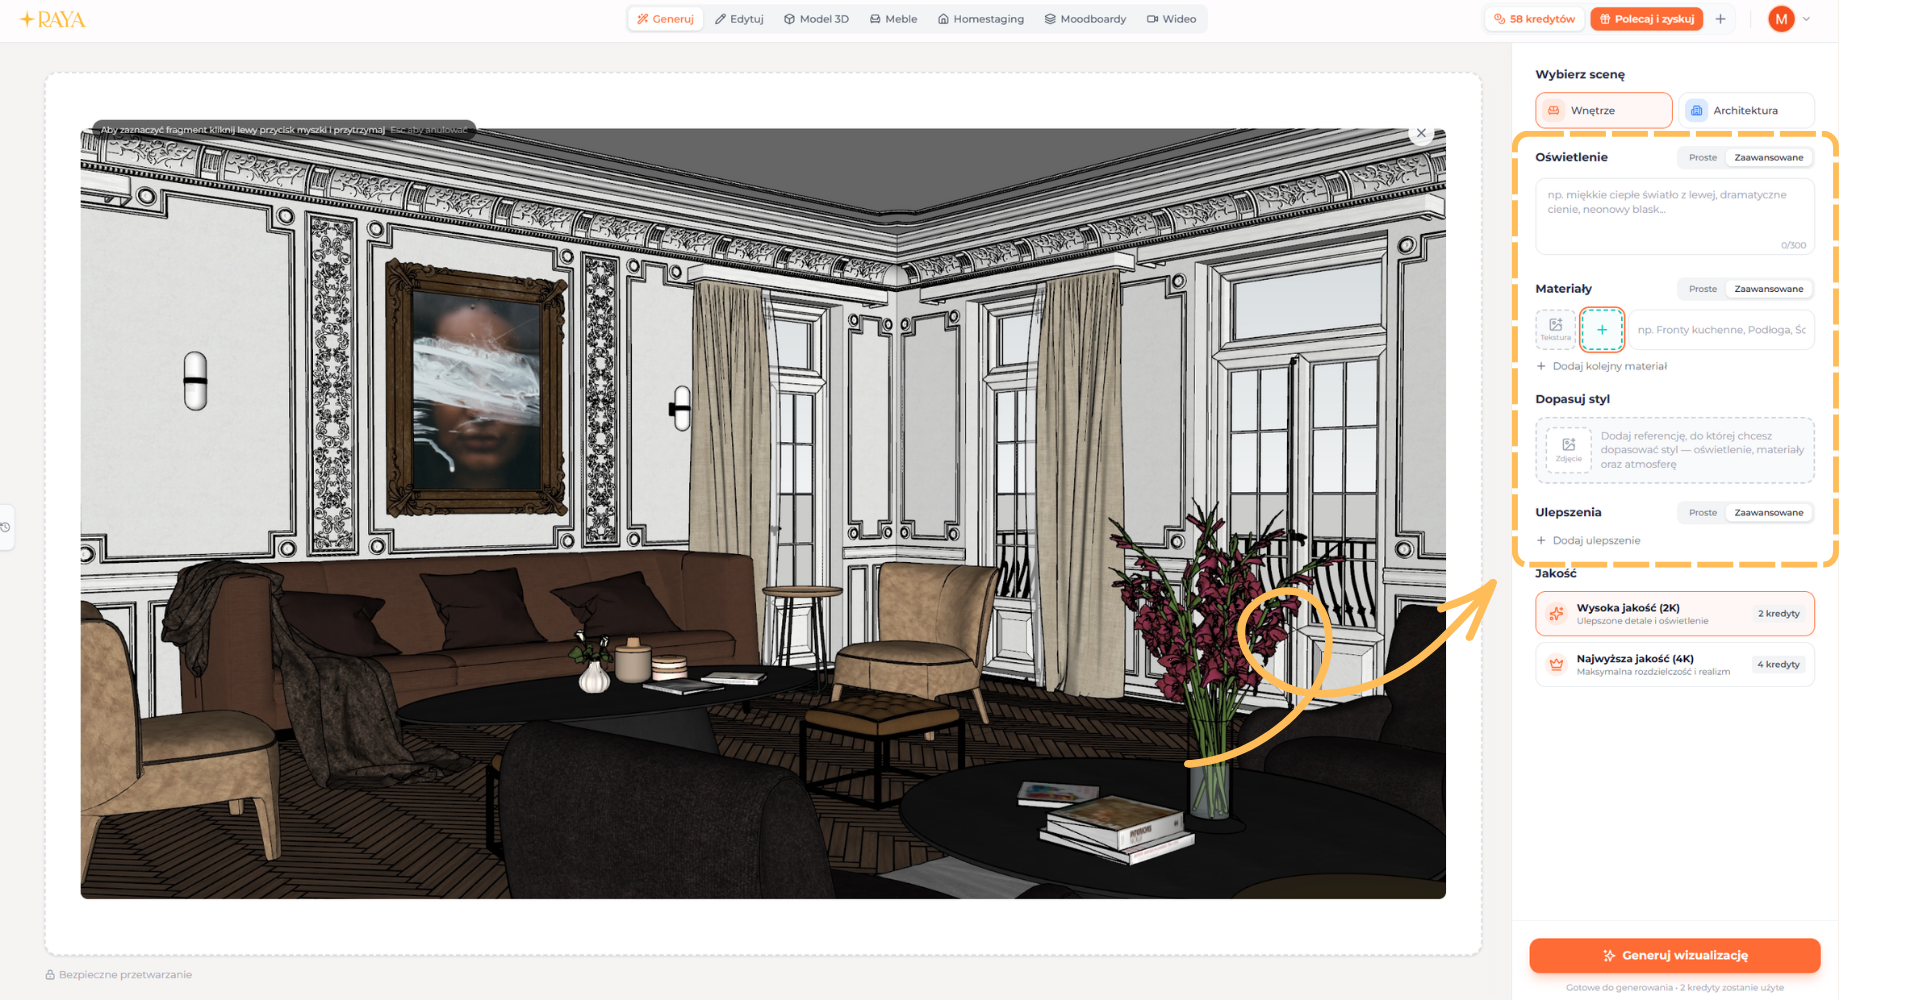
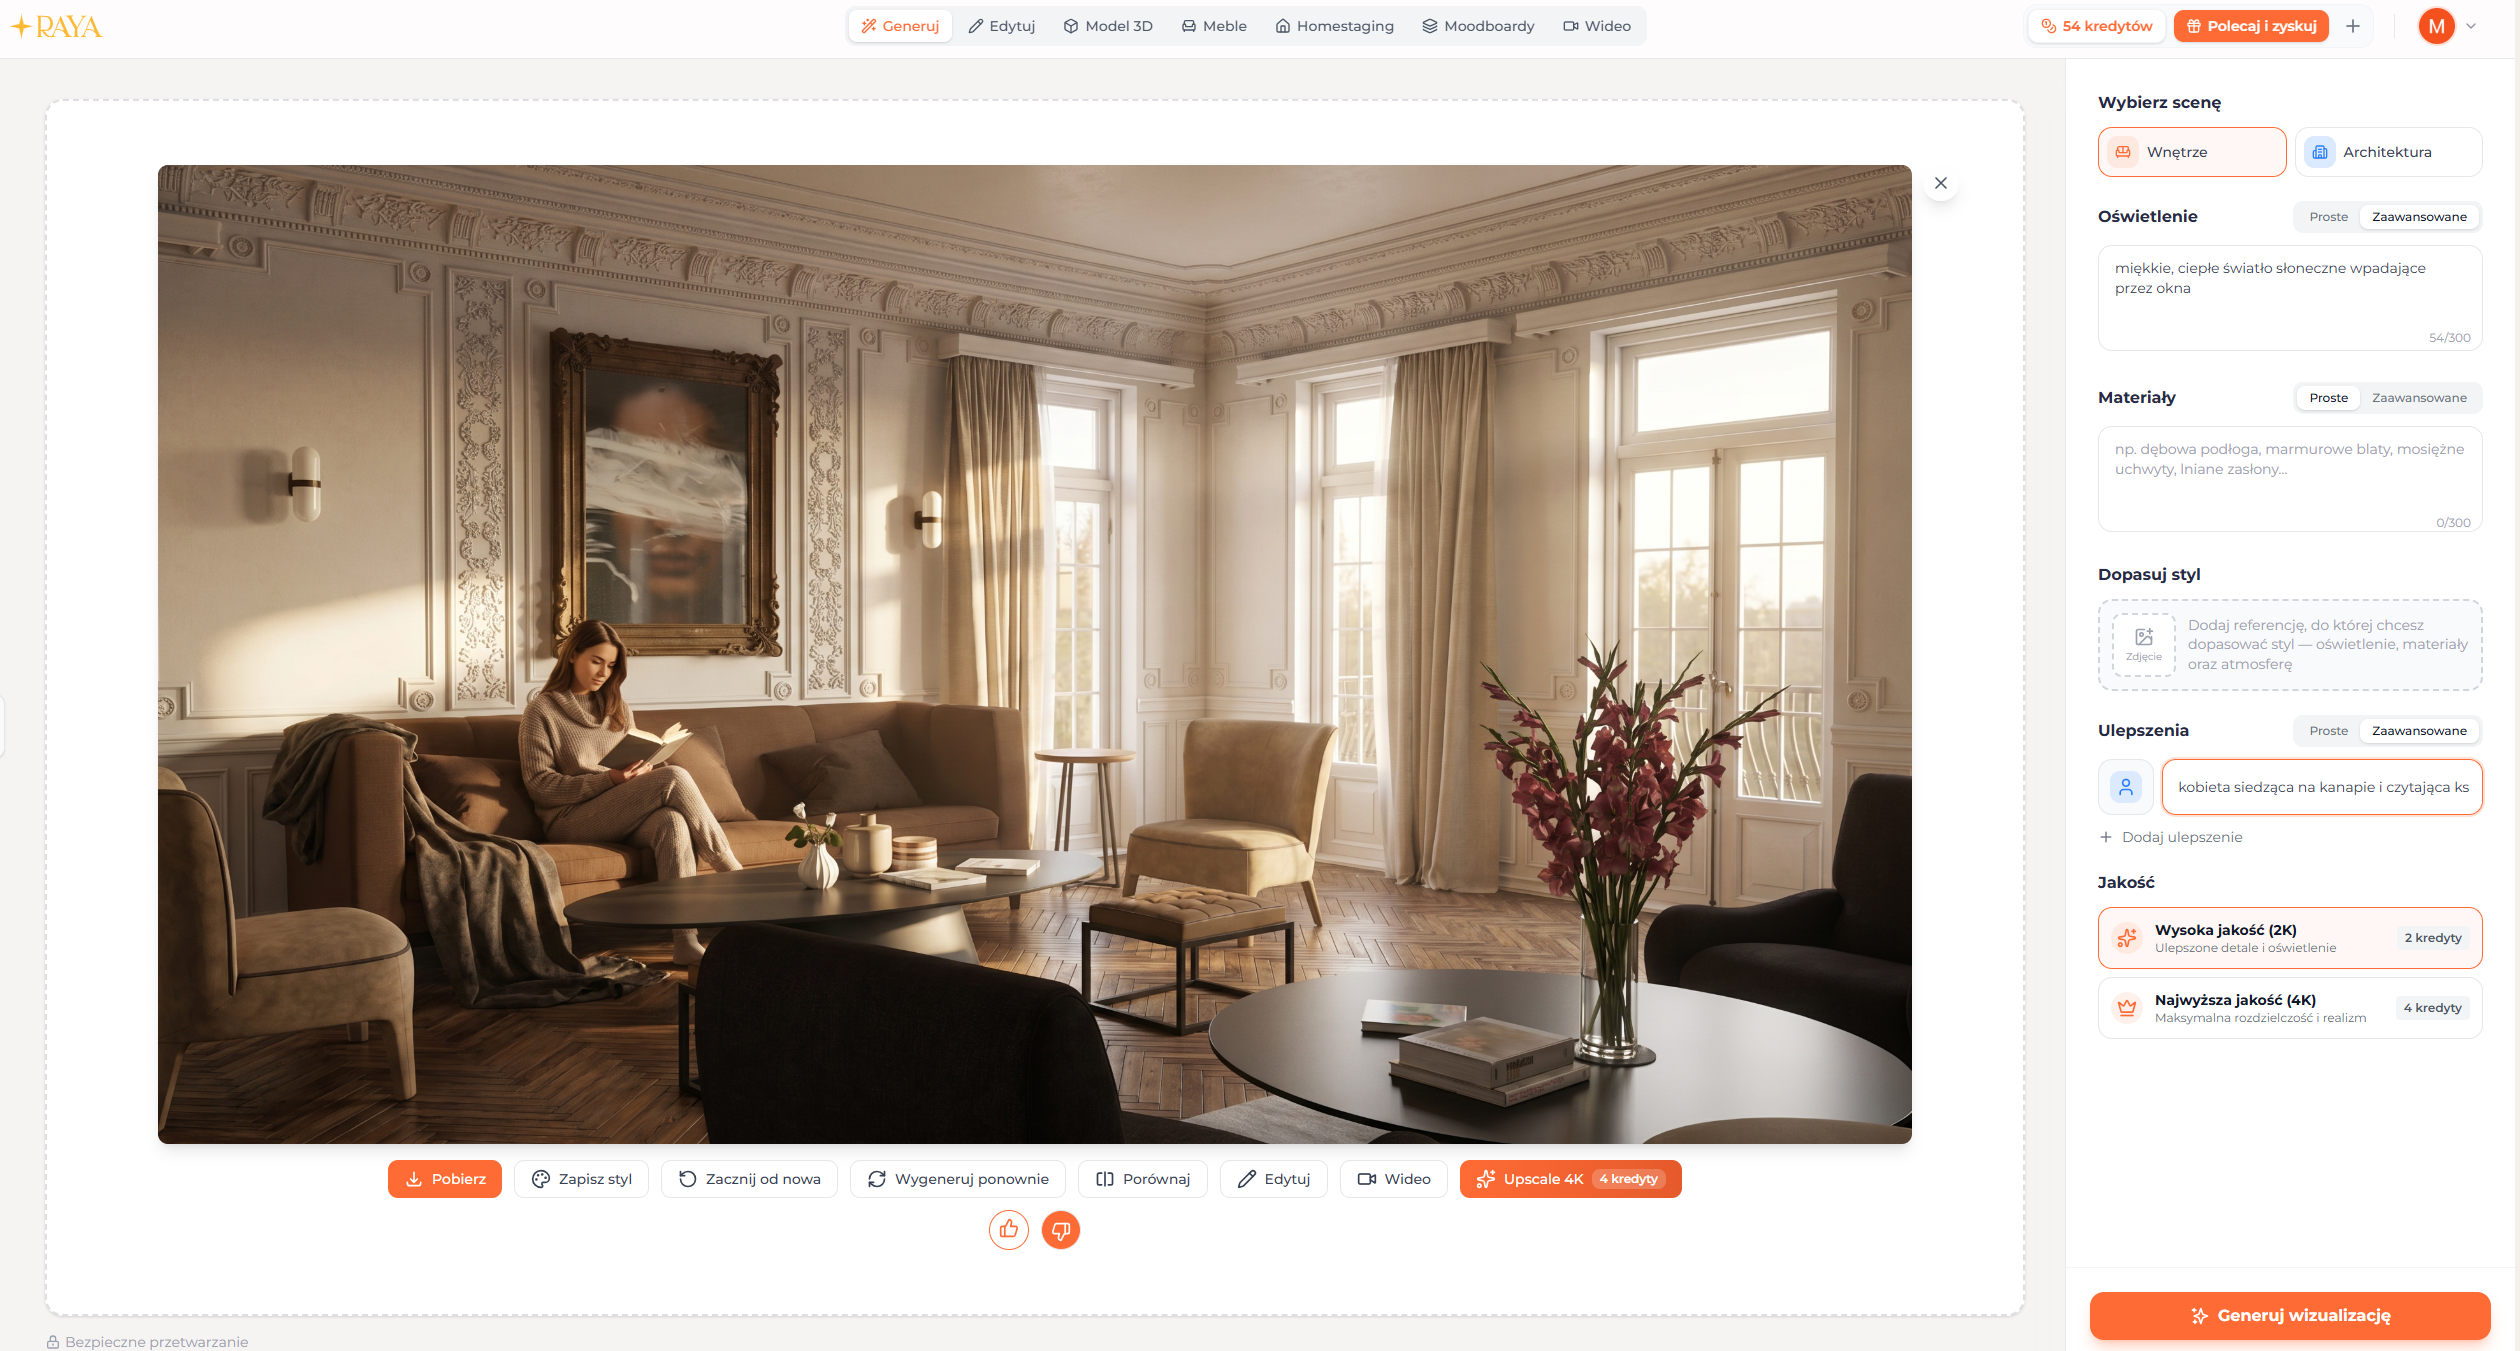
This is where Raya's biggest advantage shows. Instead of coming up with text descriptions, we simply click to select the right mood from the ready-made options - sunny lighting, cloudy or golden hour. We can also match the style to a chosen reference, giving us a consistent effect across several different frames of the same project. This whole step takes a few seconds and doesn't require knowing a single word of a prompt. We can also add extra elements to the finished scene - for example an animal, a person or a specific object - making the interior look even more natural and lively.
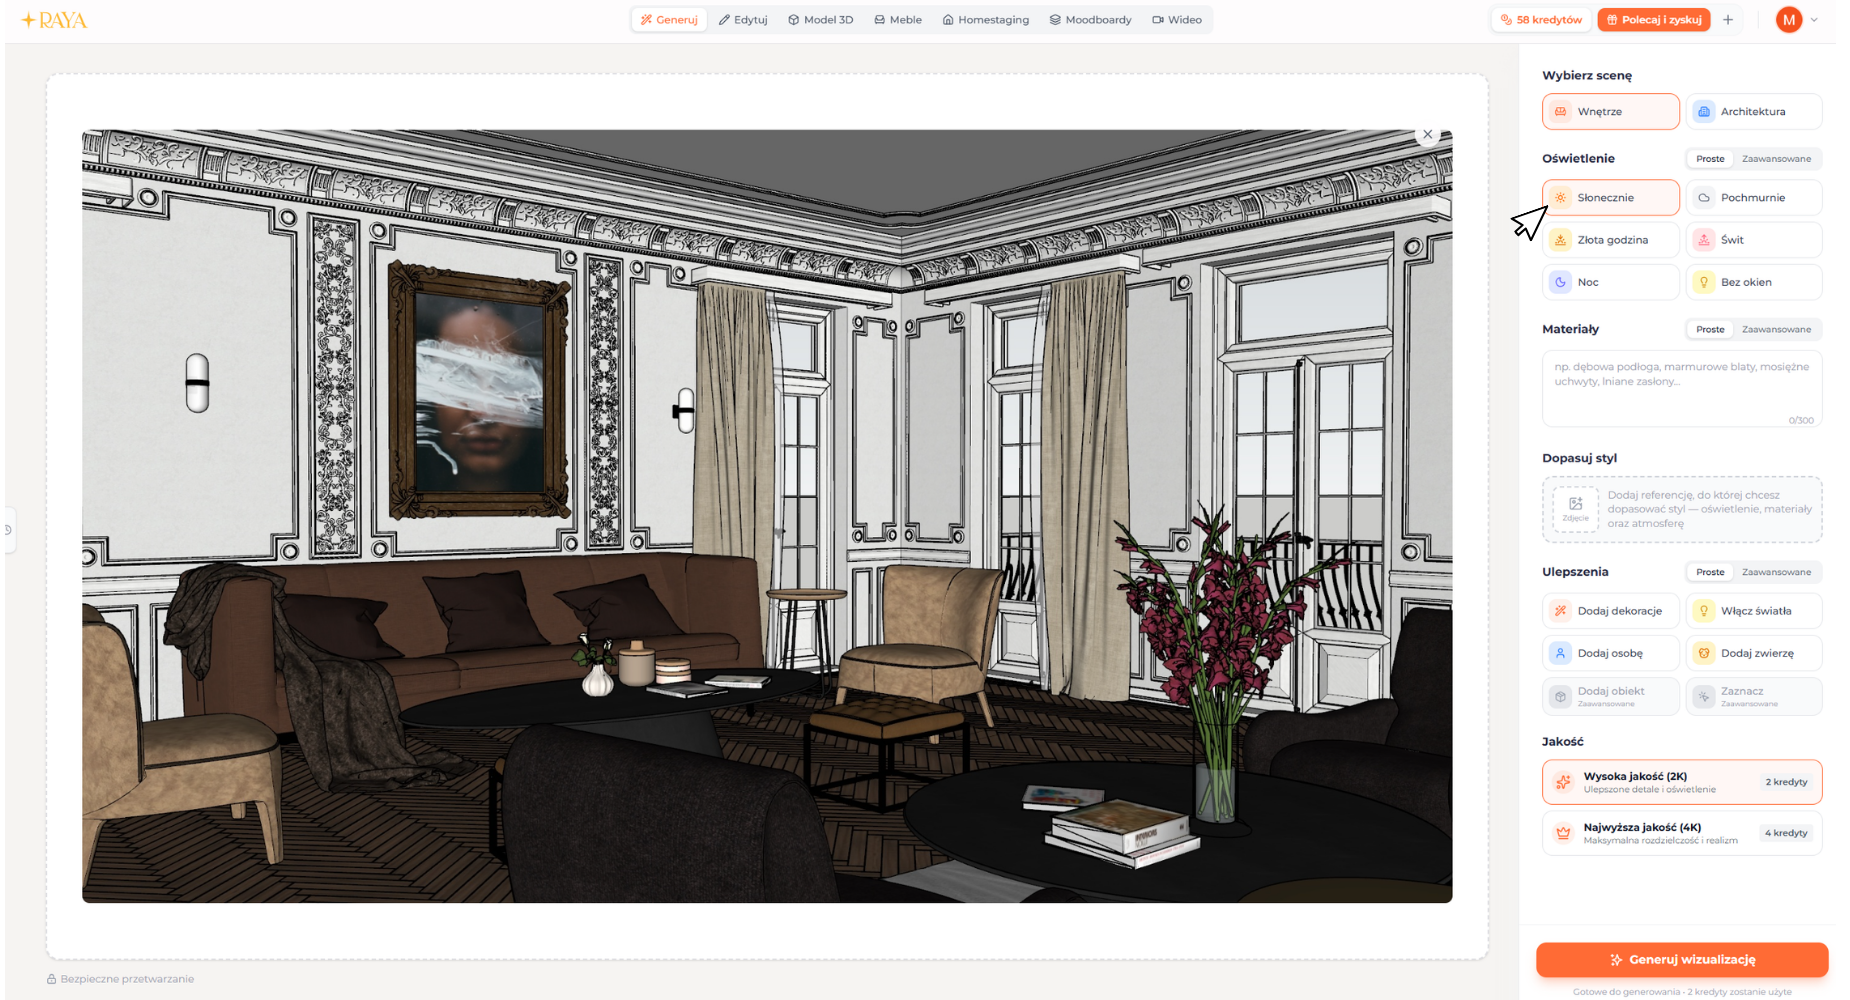
Step 3: (Optional) Advanced materials and references
If we need more control over the effect, in the "Advanced" tab we can attach additional elements - for example a specific wood texture or a photo found online of a favorite armchair as a reference. This step is optional, but useful when we already have a specific material vision and want the algorithm to stick to it as closely as possible.
Step 4: Magic in 60 seconds
The last step is clicking the "Generate" button and waiting a maximum of 60 seconds for a ready, photorealistic result. If something doesn't quite fit, the editing tools let you swap individual elements - for example a lamp, wall color or flooring - without generating the whole scene from scratch. From a single base image, we can generate several stylistic variants, making it easier to compare their effects and choose the best option together with the client. When generating, we also choose the output resolution - 2K or 4K - and the credit cost depends on the chosen quality. The finished image is downloaded in the selected resolution and can be used right away in a presentation or marketing materials.
Summary
Now that we know how to create an AI interior visualization, there's no reason to waste time on traditional rendering or an expensive photo shoot for the first concepts for a client. A few clicks and a wait of at most one minute are enough to turn an ordinary screenshot from a 3D program into a photorealistic image, ready to present at a meeting. Thanks to free starter credits we can test the whole process on our own project before deciding to use the tool regularly. See for yourself


