
How to Make a Visualization in ChatGPT? Test and Comparison with Raya.design
You can make a visualization in ChatGPT after logging into a free account: you drag a view from your 3D program into the chat window and add a short prompt. My first image was ready after 1 minute 20 seconds and looked impressive at first glance. However, the test revealed three problems: the free plan ran out after 2 images, the images are only 1254 px, and ChatGPT changed the framing and the size of the furniture. I show the whole process and a comparison with Raya on the same view.

Contents
- Where to start a visualization in ChatGPT?
- How to make a visualization in ChatGPT step by step?
- How many images can you generate in ChatGPT for free?
- What resolution do ChatGPT visualizations have?
- Does ChatGPT stick to the original design?
- How do you make revisions to a ChatGPT visualization?
- What can't you do in ChatGPT?
- ChatGPT or Raya.design - comparison
Where to start a visualization in ChatGPT?
Before you open the chat, prepare the image that ChatGPT will base itself on. A visualization from a prompt alone gives a completely random result, and generating from a floor plan is very unpredictable. You'll get a nice-looking image that has little to do with your actual design. A floor plan shows the layout from above, but says nothing about the height of the furniture, the materials, or where the camera is looking from, so the AI has to guess the rest.
The most accurate result comes from a view from a 3D program, e.g. SketchUp, Blender, or 3ds Max. You can also get good results from the free pCon.planner, and for a quick concept, a hand-drawn sketch or a photo of the room is enough.
In this test I use a view from SketchUp. We've described in detail how to prepare a model in SketchUp for AI visualizations, and before exporting, check at least these points:
camera at a height of 100-120 cm and perspective instead of a flat elevation,
Shaded with textures style, so the AI can see the materials,
thin edges, without lines that aren't part of the design,
hidden dimensions, text, and guide lines,
export at a minimum of 1440 px on the shorter side.

How to make a visualization in ChatGPT step by step?
With the view ready, you move on to ChatGPT. You can only generate images after logging in, so first create a free account. Then all you need to do is drag the view from your program into the chat window.
If the view is well prepared, meaning the textures, models, and edges are visible, you can keep the prompt to a minimum. I typed: "Turn this shot into a professional photo taken on a sunny day. Add a woman reading a book on the sofa". I deliberately avoid the word "visualization" so as not to suggest anything artificial to the model. I want the result to be as close to a real photograph as possible.
A short prompt is enough, because the view itself carries most of the information: the layout, materials, and framing are already in the image. The less well-prepared the view, the more you'd have to add, e.g. what the cabinet fronts are made of or where the light is coming from.

The visualization was ready after 1 minute 20 seconds. At first glance, the result is impressive, and it may seem that ChatGPT did a very good job. If you create such shots occasionally, this approach may be enough for you. In professional work, however, ChatGPT has a few shortcomings that only became apparent on closer inspection.
How many images can you generate in ChatGPT for free?
The first shortcoming showed up quickly. On the free plan I only managed to generate 2 images, and then ChatGPT suggested purchasing the Plus plan for $20. In this plan, the next image was generated in about 30 seconds.
Unfortunately, OpenAI doesn't specify how many images you'll be able to generate on the Plus plan, which model you'll be using, or how long generation will take. So you pay without knowing exactly what for. There's no telling whether, say, after 100 generations, the next ones will slow down significantly, as has happened in the past.
In Raya, every operation has a fixed price in credits: a 2K visualization costs 2 credits, and 4K costs 4 credits. Plans start at $5.99 per month for 20 credits, and the full Raya pricing page shows exactly how many visualizations you get with each plan. To start, you get 20 free credits with no card required, i.e. about 10 2K visualizations.
What resolution do ChatGPT visualizations have?
The second shortcoming shows up when downloading the file. ChatGPT visualizations have a resolution of only 1254 px, which is clearly too little for professional uses such as boards or printing. Surprisingly, the resolution is the same on the paid Plus plan.
What does this mean in practice? When printed at 300 dpi, an image with a 1254 px side measures about 10.5 cm, while an A3 board needs about 4960 px on the longer side. On a phone screen, a ChatGPT visualization looks good, but on a projector during a presentation or in a catalog, you'll quickly notice blurry details.
In Raya, you generate the visualization in 2K or 4K, and you can upscale the finished image to 4K (4 credits) or to 6K (5 credits). A 6K visualization has 6144 px on the longer side, so it's more than enough for an A3 board. The difference is best seen in a zoomed-in detail.
 Good example
 Bad example
Does ChatGPT stick to the original design?
Resolution is a matter of file quality, while fidelity to the design concerns its content. A direct comparison with the SketchUp view shows that ChatGPT changed the framing and the size of individual elements quite significantly.
BeforeAfterIf you just need a single shot that gives a general impression of the design, this isn't a big problem. But if repeatability and predictability matter to you, such changes are hard to accept, especially over several rounds of revisions. A client compares the visualization with the floor plan and with the other views, so a wider sofa or a shifted window will immediately raise questions about whether the design has changed.
In Raya, on the same view, the framing didn't change, and every object in the scene is exactly the same size as in the original image.
 BeforeAfter
How do you make revisions to a ChatGPT visualization?
Since the discrepancies with the design grow with each revision, I checked how ChatGPT handles editing. ChatGPT lets you select a part of the image and describe the change. It fulfilled the request to change the color of the armchairs to burgundy, but in the process it also changed the whole visualization to some extent.

With a single revision, this is a minor issue. With subsequent ones, each round moves the image further away from the model, and on top of that there's generative compression - a drop in quality with every further processing of the same image. It works a bit like photocopying a photocopy: each copy is a little worse than the one before. So regardless of the tool, gather the client's comments and apply them in a single edit instead of five separate ones.
In Raya, you make revisions in the "Edit"tab. The "Select" (Select area) feature limits the change to the selected part, while the rest of the image stays untouched. The "Reference objects" (Reference objects) feature lets you upload a photo of a specific piece of furniture, e.g. from a catalog, and tell the AI to insert or replace it. Short instructions of about 150-200 characters are enough. You'll find more examples in our guide on editing AI visualizations.

What can't you do in ChatGPT?
If you create designs professionally and regularly generate visualizations, there are three more things you'll find useful that you can't do in ChatGPT.
Plugins for 3D programs
In ChatGPT, the only way is to save the image and drag it into the chat window. For occasional visualizations this is enough, but with dozens of views a day it takes a lot of time. Every view means an export, switching to the browser, dragging the file, then downloading the result and going back to the program.
Raya has 7 plugins: for SketchUp, Revit, ArchiCAD, 3ds Max, Rhino, Blender, and pCon.planner. Thanks to them, you generate visualizations without leaving the program you design in. You'll find them all on the Raya 3D program plugins page.

Generating 3D models from a photo
If you design interiors, you've surely needed a 3D model of a piece of furniture that wasn't in any library. In the "Generate 3D model" tab, you upload 1 to 4 photos of the piece of furniture, and after about a minute you get a model in FBX, GLB, or OBJ format, ready to use in a scene. The cheapest model costs 6 credits, and to get the best possible result you can upload up to 4 photos. We've described the details in our guide on how to generate 3D models with AI from a photo.


A visualization of the finished 3D model
The second situation is the opposite: you already have a 3D model of a piece of furniture, e.g. from a manufacturer, from a library, or generated from a photo, and you need a photo of it. In ChatGPT you can only upload an image, so you first have to open the model in a 3D program and take a screenshot. In Raya, in the "Upload 3D model" tab, you upload the file itself in GLB, GLTF, OBJ, or FBX format, up to 50 MB, and you can open a model generated from a photo straight from your history there.
The model appears in a 3D preview, so you can rotate it with your mouse and set up exactly the framing you need, or choose a ready-made shot from the front, side, top, or isometric view. Then you choose the proportions, lighting, and background, and describe the materials in a sentence, e.g. "brown leather, black bent-tube frame". In the "background" field, you can switch the settings to "Advanced" and type in any description you want, e.g. "a japandi-style interior matching the armchair".
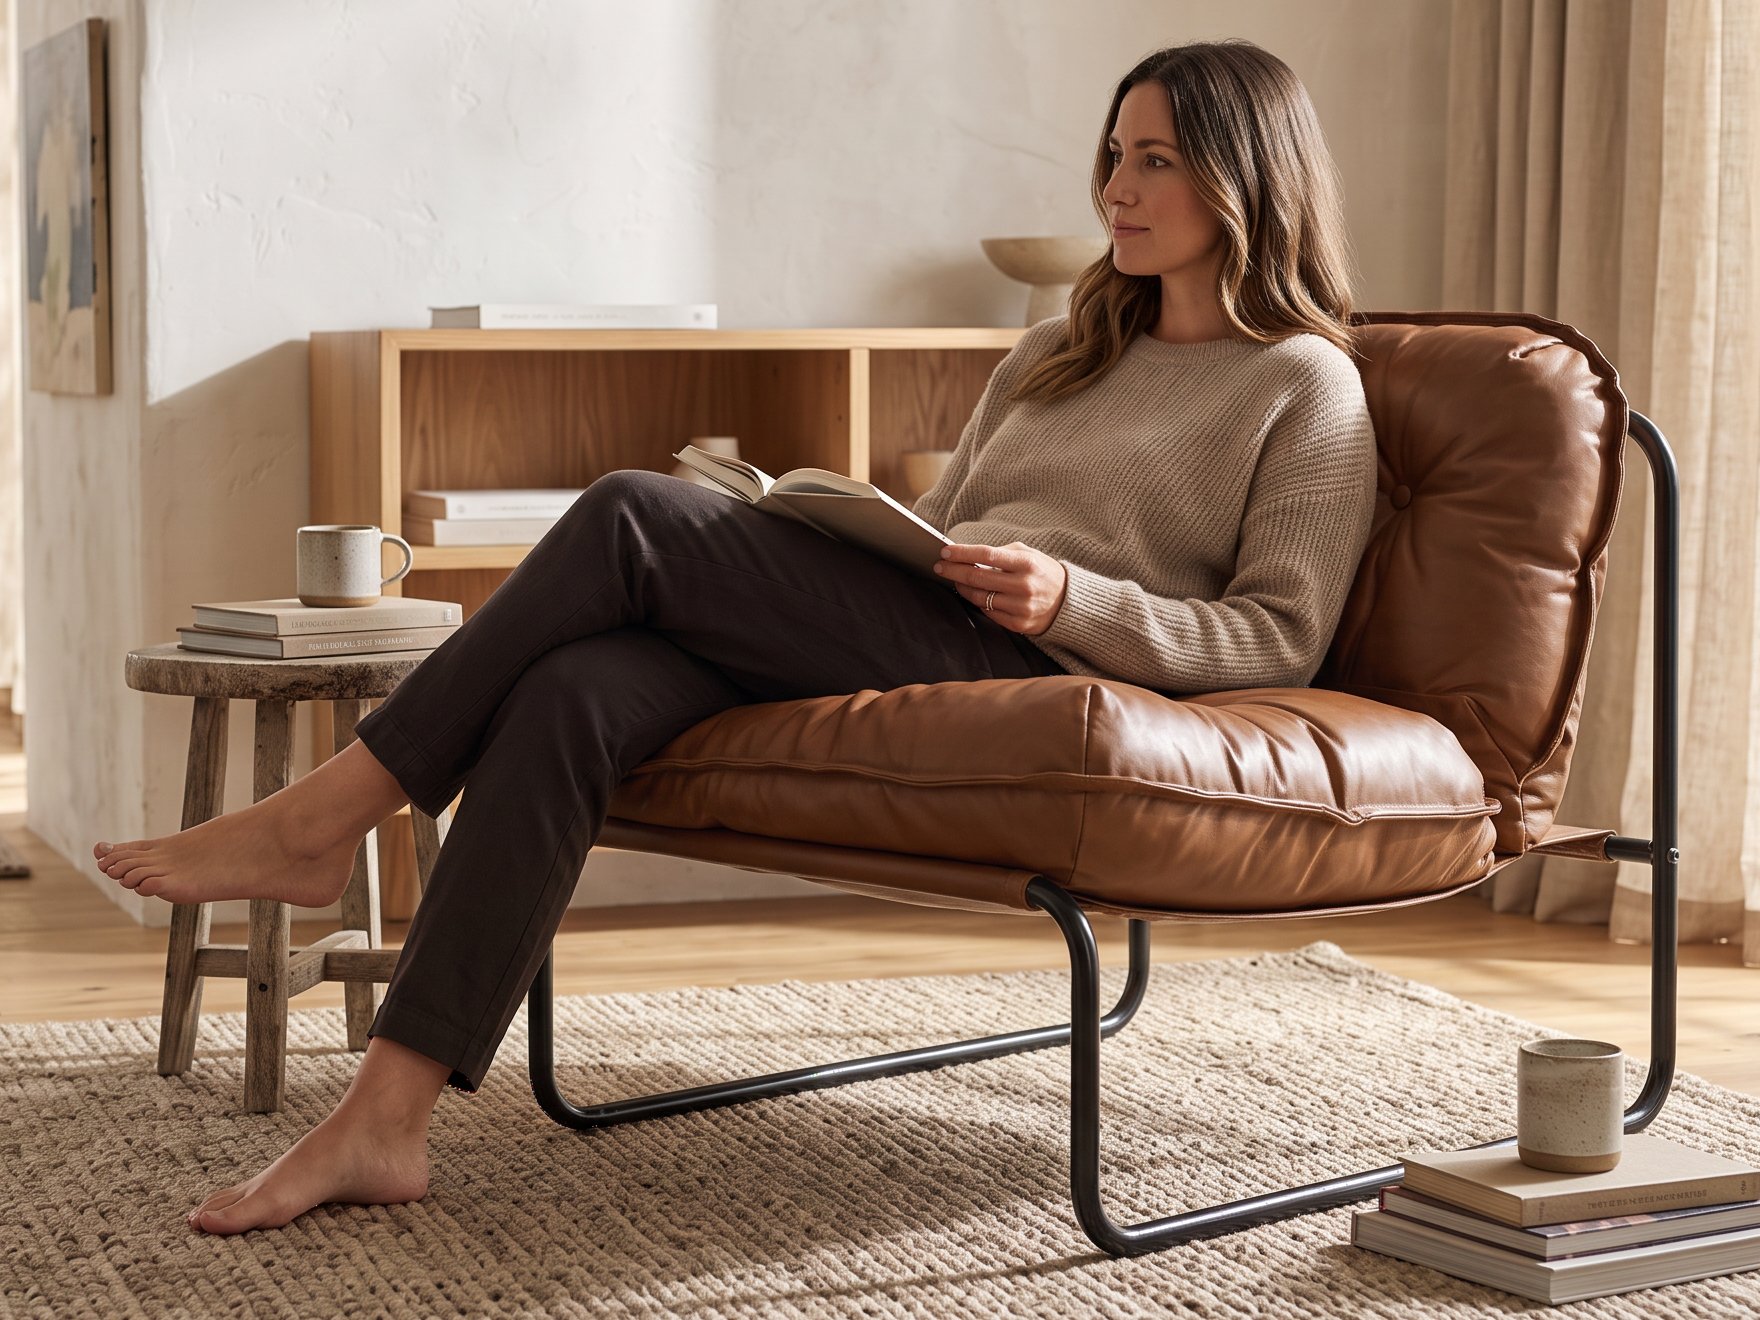
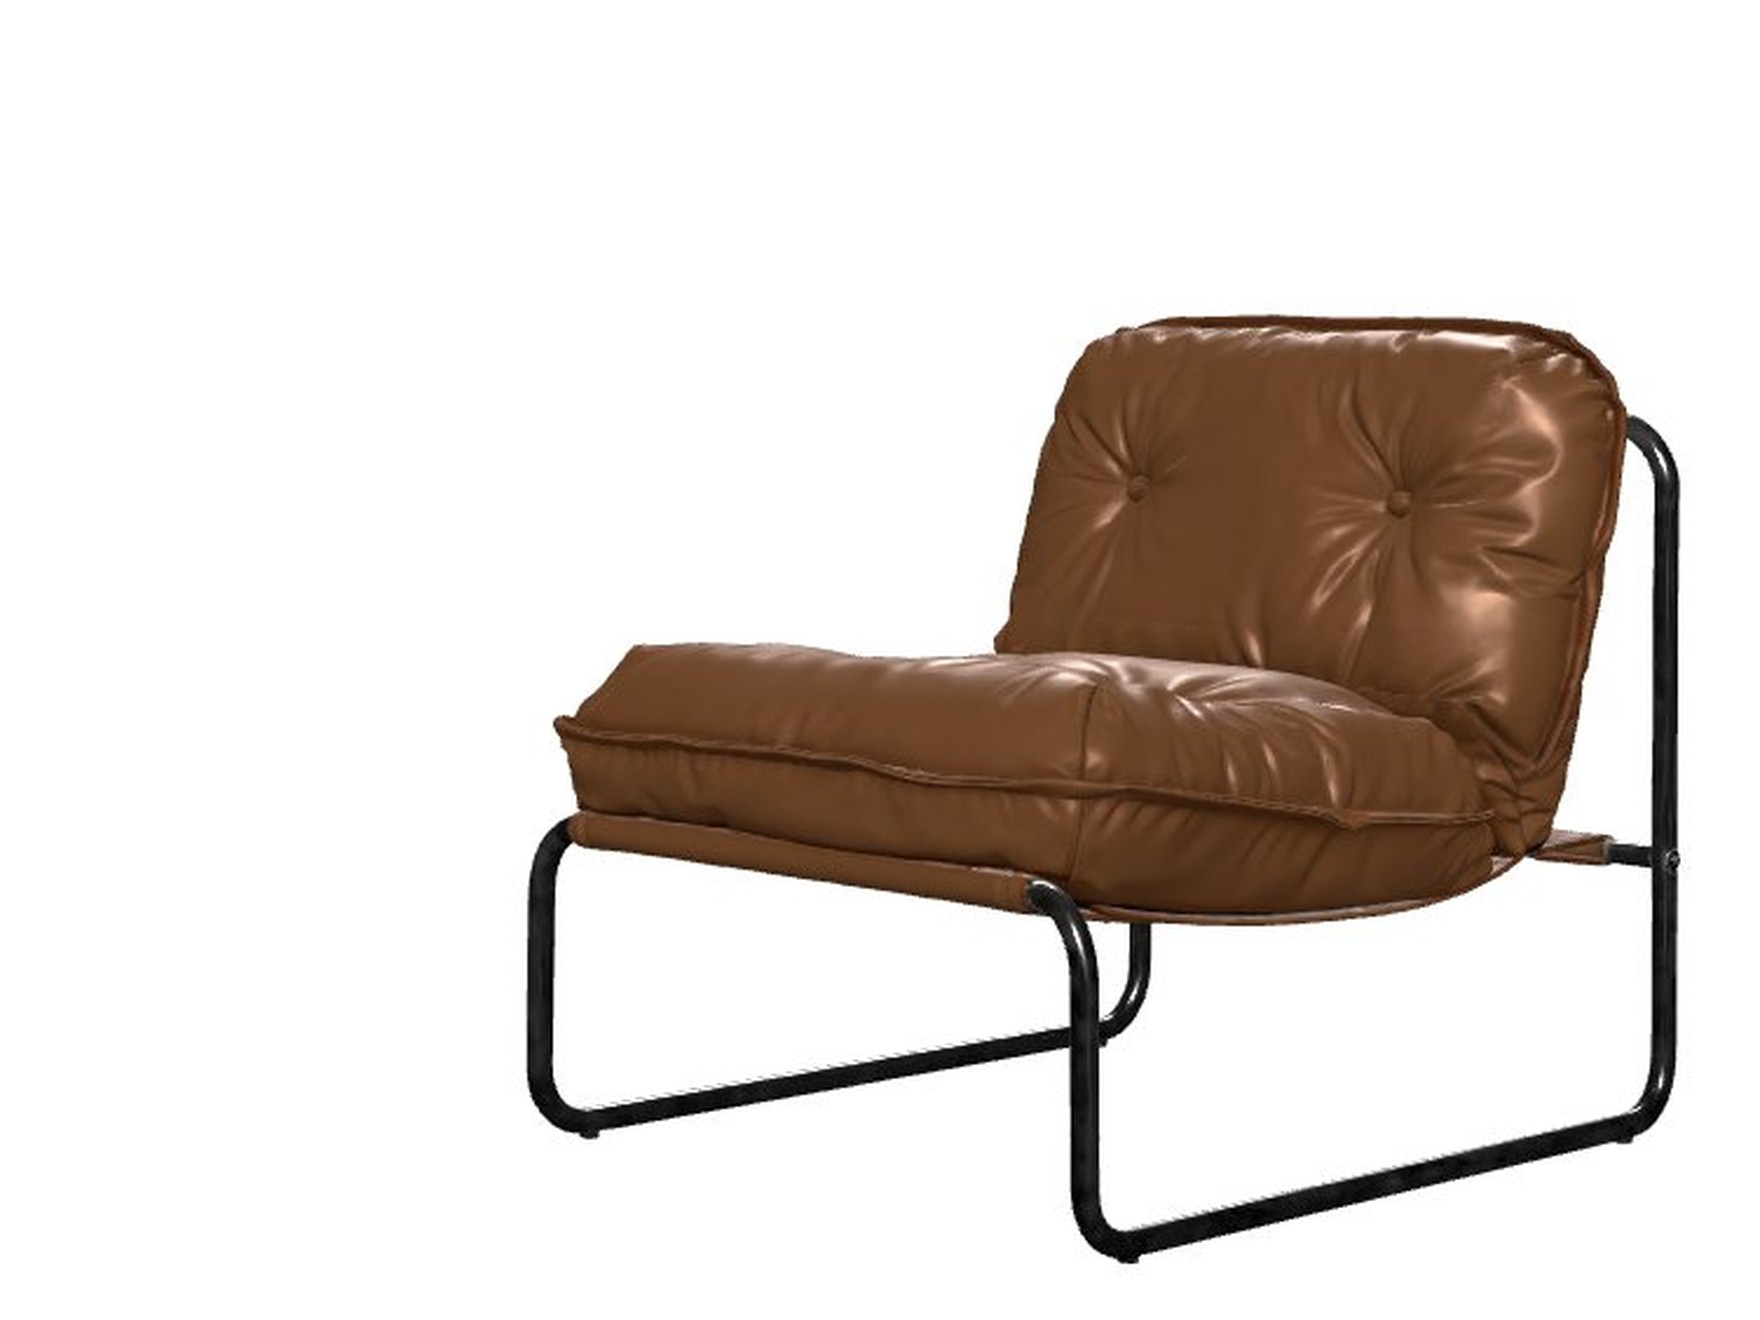 3D modelVisualization
This is how the visualization above was made: from a model of the armchair on a white background, Raya created a photo in a bright living room, with a woman reading a book. The shape and proportions come from the model, so the AI doesn't have to guess what the armchair looks like from the side or from behind. The visualization costs 2 credits in 2K and 4 credits in 4K, and the model file itself stays in your browser, since only the image of the set-up frame is sent to the AI. You'll find more examples on the page about visualizing a 3D model.
AI animations from visualizations
Do you need an animation of your design or product? In the "Video" tab, an uploaded visualization becomes the first frame, and the AI adds camera movement or an effect, e.g. furniture appearing or a change in time of day. The clip lasts 4 to 10 seconds, and you choose ready-made shots from a list, so you don't have to write a description of the motion yourself. The video costs from 5 credits and works great on social media.
ChatGPT or Raya.design - comparison
Below you can see the most important differences between GPT and Raya.design.
Feature | ChatGPT | Raya.design |
|---|---|---|
Consistency with the original | No, it changed the framing and furniture size | Yes, framing and sizes unchanged |
Resolution | 1254 px, even on the Plus plan | 2K and 4K, upscale to 6K |
Visualization editing | Simplified editing | Advanced editing panel |
Transparent pricing | No, no stated limit on images | Yes, fixed price in credits |
Visualization history | There is one, but it's not very clear | All generations in one place, including those from plugins |
Plugins for 3D programs | No | Yes, 7 plugins |
Visualizing an uploaded 3D model | No | Yes |
Generating a 3D model from a photo | No | Yes, from 6 credits |
Video generation | No | Yes, from 5 credits |
As you can see, you can make a visualization in ChatGPT, and for occasional use that may be enough. The problems start in everyday work, where consistency with the design, print resolution, and quick revisions matter. In that case, you'll pay at least $20 for the Plus plan and still lose a lot of time on handling it.
If you want to see how your view looks in a tool built for visualization, upload it to Raya. 20 free credits are enough for about 10 2K visualizations, which is enough for a fair comparison with the result from ChatGPT.


